Bay window has a special charm and brings more light into the room than a regular window. Bay window style is suitable for almost any room, whether classic or contemporary.
However, what is bay window without a seating?
It is a thing half done, it is unfinished.
A bay window seating gives you the possibility to create a cozy space where you can spend quiet, memorable moments enjoying the outside scenery, reading a book or a magazine.
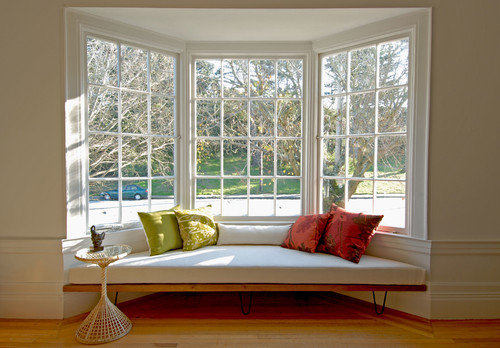
Photo by Megan Nordin – More living room ideas
Let’s see how you can do it!
Layout and Dimensions of the Bay Window Seat
– First, you should decide what you need, a small bench where you can only sit or a wide bench with cushions and pillows where you can lounging.
– However, regardless of bench size, the layout of the bay window seat should be simple.
– You need only, to measure between the sidewalls. Since the sidewalls are angled, you need to measure between the most distant points of these walls.
– Usually, a common bay window width is at least 128 inches between the farthest points.
Benefits and Tips of Impact-Resistant Windows (howtobuildahouseblog.com)
Preparation
– First, you need to clear the place.
– If you have carpet then you need to roll it back from the bay window.
– Draw a chalk line across the underlayment or floor.
– Measure the distance between the window and chalk line. Add two inches.
– The total is the width of the top seat bench.
Materials & Tools
– Three pieces 2×4 lumber – 10 ft; two sheets 4×8 ½-inch plywood
– Hinges; wood screws; paint or stain;
– Saw; adjustable tool (to determine the angle of the sidewalls); paint brushes; stud finder;
– Sand paper; level; protective gear
How to Construct the Frame Work
– Cut the 2×4 lumber, to follow the perimeter of the window.
– Draw a chalk line just below the window. Make sure the chalk line is level.
– Using a stud finder, find out where the studs are and mark them on the wall.
– Set the 2×4 studs on the wall with wood screws. Make sure the top of the studs is in line with your chalk line. Set all three studs pieces following the bay window perimeter. You should install the studs at a height of 17 inches.
– Measure the distance between the floor and the bottom of your already installed frame.
– Cut 6 pieces of 2×4 and place them under the edges and joints of your angle wall frame.
– Now it is the time to build the front frame of your bench. Therefore, you need to measure, once again, the distance between the most distant points of the angled sidewalls.
– Cut two 2×4 pieces of this size. They will be the top and the bottom of the front frame of your bench.
– Drill the edges of the wall frame. Secure the front pieces to the frame edges with wood screws.
– Cut six 2×4 pieces at 15 inches. They will be the supports for the ribs of your seat. Screw them every 2 foot along the front and rear of the frame.
– You need to create the support for the seat. Measure, once again, the distance between the front and rear of your frame.
– Cut three pieces 2×4 of this size. Screw them between front and rear of your frame.
– It is a good idea to use the space under your bench for storage. Therefore, it is good to have a lift lid seat.
– Use ½-inch plywood for the top of your bench. At this level, you need adjustable tool for creating a correct bench top, depending on the angle of the sidewalls.
– In addition, you need a piece of ½-inch plywood for the front of your bench.
– Install hinges to your bench top
– Paint or stain your bench in the desired color.


