There are many reasons to replace a wall with a load bearing beam. Maybe you need to open up cramped rooms, to create an open kitchen dining area, or to make a larger living room and so on. That works fine if you’re removing a partition wall. But what if you want to remove a load-bearing wall?
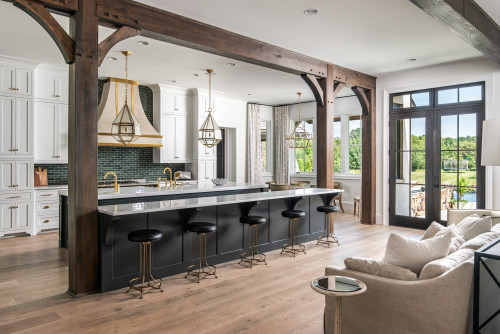
Photo by Noble Johnson Architects – More kitchen photos
What is a load-bearing wall? Load-bearing wall provides separation between rooms and is also required to transfer loads from other parts of the structure, roof and floors etc., down to the foundations
A simple way to determine whether a wall is load-bearing is to look in the attic for the direction of the joists. If a wall is running parallel to them then it probably isn’t load-bearing, while if it is running perpendicular to the joists it might be or should be treated as if it is.
Mediterranean Style Homes | How To Build A House (howtobuildahouseblog.com)
Structural Support: However, if you wish to remove an internal wall, or form an opening in an internal wall, building regulations will normally apply. Before removing a load-bearing wall, a structural engineer or surveyor can be employed to determine if the wall is load bearing and then design a beam to cater for these loads. The structural engineer will check the size, issue a permit and check your work when you’re finished framing (before you start any drywall or finish work).
In many cases a full-service lumberyard will size the beam (all support beams are rated according to their load) and sell it to you.
Depending on the span and loading conditions, the beam might consist of multiple plies of dimensional lumber, heavy timber beams, multiple plies of engineered lumber, solid engineered lumber or steel.
Fire Safety: If the beam is steel then it should normally be protected against fire so that it will have 30 minutes resistance to fire (if measured in a standard test). This resistance can be achieved using two or more layers of plaster-boards.
If an exposed timber beam is preferred then a calculation is generally required to demonstrate how much inherent fire resistance it has – dependent on its size and species of timber.
A concrete beam has adequate fire resistance properties.
Considerations: Generally, installing the beam is a two person job. The beam will have to be supported by either a column or solid wall at both ends.
– Longer span beams require deeper beam sizes.
– Use 2×4, 2×6 studs – for light loads
– Use 4×4, 6×6 studs – for intermediate loads
– Steel columns (square and round) – for heavy loads
– The load from these columns will have to be tracked through floors below. Make sure the below structure have sufficient capacity to support the new loads from the columns.
Knocking the walls down:
– Remove everything from the room being renovated, hang dustsheets and cover the floor surface if it is in good condition and needs to be protected. There will be a lot of dust so wear a protective dust mask. Protect your eyes with goggles. Ensure that anyone helping you and working in the vicinity follows these appropriate safety precautions also.
– Turn off the circuit breakers for any outlets or switches in the wall you’re removing. Remove the baseboards on both sides of the wall and any electrical cover plates.
– Slice with a utility knife through the tape at inside corners at the ceiling, and at any adjoining walls.
– Remove the drywall. Bang holes in the wall and check for obstructions. If there are no obstructions behind the wall, use a claw hammer and wrecking bar to tear off the drywall so that you can clearly see what’s in the wall.
– Assemble two beam cradles from pairs of 2x4s and screw them to the tie plate and floor with 3-in. screws. Measure the distance between the top plate and floor of the existing wall, and subtract the height of the beam. Make the supporting member about 1/4 in. less than the beam width so you can set the beam easily and shim it up tight to the plate on the ceiling
– Knock out the bearing wall studs with a sledge and bend over the leftover nail shanks in the bottom plate to protect your feet.
– Remove the backer stud. You need to cut the nails that hold the backer studs and then cut the backer stud in half to remove it.
Set the beam in place:
– Cut the beam to length and cut notches to clear the plates in adjoining walls.
– Then slip the beam members into place and rest them on the temporary cradles, on their support posts. Your ceiling should not move or start to sag when you remove your wall if you have prepared correctly.
– Toenail and/or use plate supports to secure your beam to the posts and joists. Beams need solid support all the way down to another beam or the house foundation.
– Remove the support wall and call for a framing inspection.
– Use standard drywall techniques to finish the area from the beam to the existing wall. If you choose to, you can use doorway trim to frame the opening.


