The best thing about building concrete steps is that they fit-in nearly anywhere, will go with any décor. The keys to building concrete steps are taking time to have the proper set up of the forms and finishing of the concrete.
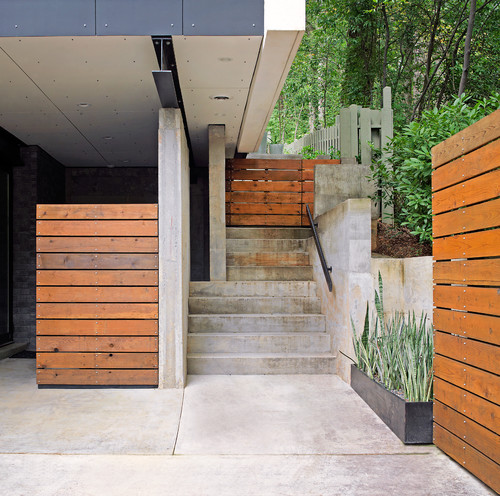
Photo by MESH dbs – Discover patio design inspiration
However, maybe you might prefer prefabricated concrete steps, instead of pouring porch steps on your own. Prefabricated concrete steps are low in cost and of very high quality.
But, let’s get back to how to pour concrete steps.
Materials & Tools:
– Hand tools, rakes, shovels, brooms
– Level, ruler, hammer, saw, tape ruler, saw, hammer, nails
– Wheelbarrow or portable concrete mixer, mixer trowels
– Sand and gravel
– Plywood, lumber for forms and stakes
– Some type of oil
STEP 1 – Stair Layout – Figure out the size of the concrete steps:
When building concrete steps, or any steps, the first step is to figure out the floor to floor height and the length of the stairway. But before you start building concrete steps, check with your local building codes to make sure you comply with any dimensions they require. Keep in mind you will also need to look into what is required for handrails.
Exterior concrete steps are most comfortable with a 12″ tread and a riser height between 6 to 7 3/4″ with 7 1/2″ being the most desirable.
1/ The height of one floor to the other = the total rise to the stairs
2/ Measure the horizontal distance the staircase will span
3/ Measure the width of each step from left to right in the area where the staircase will go
4/ Divide the elevation by 7.25 to see how many steps you’ll need. This height is typical for step risers. To get it to come out evenly, you may have to go a little above or a little below 7.25 inches
5/ To figure out the total run of the stairs – If you are using the top landing as the last tread then there will be one less tread than there is risers. For a simple 3 riser set of concrete steps there will be 2 treads. Multiply the tread length (12”) by the number of treads, the answer is your total run.
Laying Concrete Block in an Old Retaining Wall – Tips (howtobuildahouseblog.com)
STEP 2 – Site Preparation:
After you figure out the floor to floor height and the run length of the steps you will next prepare the ground to hold the concrete. The idea of this is that you’re going to get a relatively level surface that is hard but flexible and with no extra debris around it. There is nothing worse than building concrete steps that sink and / or separate from the house.
1/ Clear the area completely of grass, roots, debris or whatever else you find there.
2/ Go below the surface by about 6 extra inches. The dirt should be compacted very well.
3/ Then using sand or gravel, give yourself about four or five inches of surface to work with.
STEP 3 – Build step forms:
The form can be made with plywood or framing lumber. It can be made from scrap or low-grade lumber. In fact, the rise and run of the stairs will determine which material is best to use.
1/ Cut it according to the dimensions you specified in your design. This should look like the view of a staircase from the side.
2/ They must be securely adhered to the building’s foundation.
3/ Add wooden stakes as bracing against the outward movement of the poured concrete every 12 inches along the outside surface of the form.
4/ Install the boards that will form the face of the risers. These should have a width equal to the height of the riser. Depending on the width of the stairs, you might have to add bracing to the center of each riser.
5/ Plumb and level them before proceeding further.
6/ Coat the form with oil so that it will release from the concrete that will be poured.
STEP 4 – Mix the concrete:
You can mix the concrete by hand, or you can use a portable cement mixer. Make sure the concrete is not too runny. Overly wet concrete will try to slump down and push up under the lower steps. However, if the concrete is too runny you can pour the lower step and wait a bit before pouring the higher steps.
STEP 5 – Pouring the concrete:
1/ Start pouring the concrete into the bottom step first. Consolidate the concrete by tapping the outside of the forms with a hammer and spading the concrete with a shovel on the inside of the forms.
2/ Once the form is all the way full of concrete you’ll take a board and draw it backwards and forwards across the top of the concrete. Using it like a saw smooth the top of the concrete surface.
3/ Level off the ridges and make sure that you have no open areas.
STEP 6 – Add the finishing touches:
There are many finishing methods you can use to get a smooth surface while building concrete steps… Putting the final finish on the concrete is the key to have a nice looking set of stairs.
The concrete should be dry enough so no water is visible on the surface of the concrete and moist enough to work up some cream when you trowel the surface. After you have troweled the surface smooth use a broom and drag it across the surface of the concrete to give it a non-skid texture.
STEP 7 – Cure the concrete:
Keep the concrete surfaces damp for seven days while it cures. You can do this by covering the steps with burlap wetting the burlap, or you can tightly cover the concrete using plastic.
Spray your steps with curing compound. This task is essential in order to keep the relative humidity of the concrete above 80% so that curing does not cease.
After a week, the concrete will have attained its final shape, and you can remove the form lumber. Curing will continue to take place over a period of months.
If after you’ve completed building concrete steps you plan on staining them it is important that you allow the concrete to cure for at least 30 days so that the staining will take properly.


