Building a brick column will add charm and architectural interest to patios, fences, entryways, to any area where they are present. Their height vary from short to tall, and are often used to create accent deck, porch railings, freestanding columns for decorations or even act as plant stands in your garden.
They are also very durable, lasting for decades, and far more cost efficient compared to other fence and column materials. Building brick columns is surprisingly easy. One handy homeowner with right tools can erect an attractive structure.
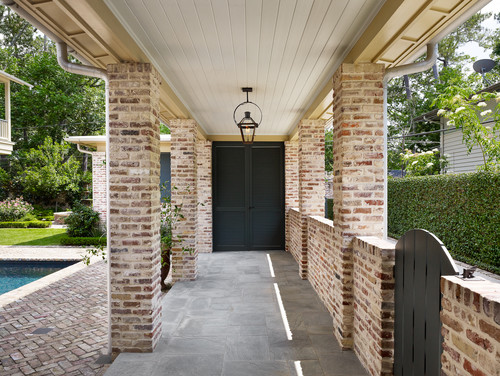
Photo by Dillon Kyle Architects (DKA) – Search patio pictures
Materials & Tools
String line; Mortar; Trowel; Masonry bricks; Screed; Concave joint tool; Light whisk brush
Step 1: First of all, decide on the size of brick column you would like to build, this will help you calculate the amount of materials necessary to execute your plan. You may have more options:
– A 12 inch x 12 inch (30.48 cm x 30.48 cm) column = 4 bricks per layer.
– A 16 inch x 16 inch (40.64 cm x 40.64 cm) column = 6 bricks per layer.
– A 32 inch x 32 inch (76.2 cm x 76.2 cm) column, you will have to create a 24 inch x 24 inch (60.96 cm x 60.96 cm) block column for support and wrap it with a 32 inch x 32 inch (76.2 cm x 76.2 cm) brick surface to guarantee a sturdy post.
However, if you wish to build a wider column you can save considerable amount of work and material by simply veneering the bricks around a block column. It is advisable to fill the inside of the columns with either mortar or concrete for better stability. In fact, you can only throw wet mortar in the column as you go along laying the bricks. If you veneer the bricks around the block column then the column needs to be solid concrete.
Step 2: Wet the bricks a couple hours before beginning the construction of the column. This will prevent the bricks from soaking up too much mortar.
House Tour of a Modern Home Interior with a Unique Look (howtobuildahouseblog.com)
Step 3: Outline a 12 inch x 12 inch (30.48 cm x 30.48 cm) blueprint of your column on the ground where the base of the brick column will be located. There are two ways to install the bricks:
1/ Use a 6 ft level and plumb each curse as you go along building the column.
2/ (IT is RECOMMENDED) Pull a string line from the edge of the first brick on the bottom to the very top on each of the corners.
This will be a little effort to line up the edges at first but it will save considerable amount of time by not using the level every time you install a brick. You just simply have to line up the corner of your bricks to the string and it will provide you with an accurate guideline all the way up to the top. Check if your joints are equally sized and if the bricks are perfectly level on each courses.
Step 3: Slather a thin layer of mortar for the base of the column, smoothing it out using a screed. (A screed is an aluminum device used to flatten out and smooth wet mortar)
Step 4: Lay 4 bricks in a square design, leaving 1/2 inch (1.27 cm) spacing between each brick. This spacing is called a joint.
Step 5: As you go along with the installation of the bricks you have to do some minor touch ups, such as filling up or tuck-pointing the joints with mortar. The most commonly used joints are either concaved or raked out (square recessed) joints.
Step 6: If you finished tooling the brick joints you have to brush it with a light whisk brush to smooth-out the surface of the mortar.


