Building a stone walkway is easier than you think.
Planning:
a) A good plan is essential to a successful paving project. Think about where you want your path and using a rope, garden hose, stakes and string, or spray paint to mark the position of your pathway, follow high-traffic areas as a guide.
b) Your project will need to have adequate drainage if you want it to be safe and dry. . To ensure adequate drainage, you should have a slope of at least 1/8″ per linear foot.
c) A 30- to 36-inch path is wide enough for one person to walk comfortably, and 48 inches is good for two side by side; a 50- to 60-inch width is needed for a riding mower.
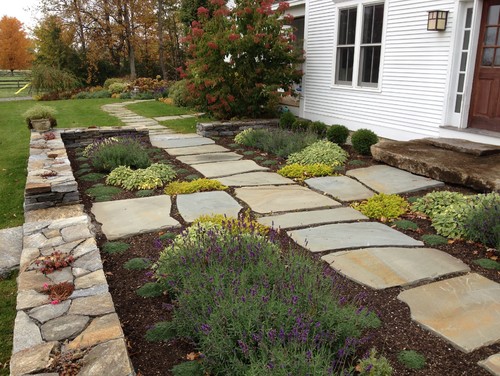
Photo by Linden L.A.N.D. Group – Browse landscaping ideas
NOTE: Laying stepping stones can be done in two ways:
a) You can lay your stone pathway in the grass.
b) You can make your stepping stone pathway in an excavated bed of any other materials.
Stepping Stone Pathway through Grass:
You should dig out a couple of inches deeper than the thickness of the stone. Your goal here is to have the top of the stone set at the same level as where the grass meets the soil. This makes it easier to mow over without damaging your mower blade.
Put down a couple of inches of sand or crushed rock.
Then drop the stones and twist them to settle. Use for help a rubber hammer.
When you have stabilized the stone try walking on it and rocking it. If it is still moving, go back to adding or removing sand.
Once your path is set go back and fill with loam all the gaps. This will allow the grass to migrate into the soil and make the gap disappear much quicker.
Stepping Stone pathways in other Materials:
Depending on the thickness of the stone you will be using, dig out the soil at 6 or 7 inches deep within your outline to keep large stones, tree roots and freezing/thawing water from disturbing the finished path.
Lay down the base. The base material is usually coarse, crushed stone. Fill the area with 3 to 4 inches of crushed stone, maintaining a uniformly level layer. Add no more than 2″ at a time to the entire excavated area, and then compact it with a hand tamper. If the path is on a slope, move from the low ground to the high ground.
If you do not want weeds cropping up between the pathway stones you may opt to lay down a weed control filter fabric over the crushed stone.
Install the edge restraints that will help hold the shape of your project over the years. Place these restraints, usually made of plastic, aluminum, or steel, around the perimeter of the project and secure them into the ground with 12″ spikes. If your design is irregularly shaped, you’ll need to cut the restraints in order to follow the edges of your design.
Apply a leveling course by covering the gravel with 1 to 2 inches of fine builder’s sand. Smooth the surface with a rake.
Saturate the area with water and allow the water to drain completely overnight. This will remove air pockets from the base and encourage full compaction.
Lay the stones, fitting them close together like jigsaw puzzle pieces with ¼-inch gaps; the convex edge of one piece should fit into the concave section of the next. Twist each stone into the sand and tap it with a rubber mallet to set it. The stone should settle fairly easily.
When you have finished laying the entire path, fill the joints between stones by sweeping the sand or stone dust into the spaces and watering the whole walkway gently.
Creating an Easy Access to Your Home – Amazing Ideas (howtobuildahouseblog.com)


