Wooden fences are beautiful and make a great addition to a house. For sturdier and termite-resistant fences, the wood is often sprayed with fertilizer or a special type of chemical to prolong its life and durability.
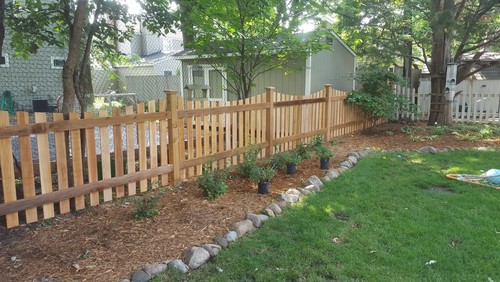
Photo by Dakota Unlimited – Look for patio design inspiration
However, it doesn’t completely protect the wood from natural wear-and-tear. Despite this, wooden fences are still preferred over other fence types.
Fence building is not as hard as you may have imagined.
There are many styles of wooden fences. Wooden fence Styles include stockade, picket, lattice, and post and rail.
The most popular Wooden Fence Styles are:
1. Privacy Wooden Fence: Typically, boards are placed tightly together to conceal all cracks between so it’s almost impossible to see into the yard.
2. Semi-Privacy Wooden Fence: Boards have a gap between each one of 1-3 inches so that it is possible to see through the fence, but it still serves it’s purpose to keep people out, or your pet in.
3. Split Rail Wooden Fence: This wooden fence style typically will have posts every 8′ and then have 2 – 3 rails running parallel to the ground with gaps in between each of the 3 rails and the ground. Often times another board is added to the top laying flat on the top rail.
4. Picket Fence: Probably the most popular fence of all time is the picket fence. It’s a very traditional style which has almost become iconic in North America.
Despite the variety of wooden fence styles, there are three basic components for building wooden fences: posts; rails; panels.
Building a Wooden Fence:
Building a wood fence yourself requires you to do good planning before hand, so know where your panels will run up to, stop, and how they will connect.
1. Lay out a line where the fence is to be installed which usually will be along your property.
2. Determine the height the fence should be to meet your needs. Privacy wooden fence will be 6 feet height.
3. Set your “end posts”. You need to know where you will place to corner posts.
a) Dig posts holes; Dig your post holes deep enough to support the fence structure. Use a regular post hole digger to dig the post holes.
b) Place the end posts in the holes, and fill in around the posts with concrete, but first check their verticality (if they’re plumb).
These are the posts located at either end or any corners along the fence. (Wooden fence posts are one of the most common materials used to install fences. There are several procedures to treat the wood so the posts can long last and resist decay and bugs. The common type of wood posts are made are cedar and redwood).
4. Pull a builder’s line from one end post to the other, at an equal height above the ground. This will allow you to dig the intermediate holes in alignment with the fence, and give you a depth so that the posts will all be the same height. Lay out the post holes between the end posts eight feet center to center, and dig the rest of your holes. You need to dig your holes deep enough because properly set fence posts will hold all the other components in place.
Posts sometimes stand only as high as the tops of the fence panels. In other wooden fence styles, the posts are allowed to extend above the panels.
NOTE:
a) Take time to measure and position the posts accurately. The appearance and the structural strength of your fence depend a great deal on the positioning of the fence posts.
b) Set all wood fence posts with about 1/3 of their total length buried in the ground. This is especially important on corner posts and any posts that will carry heavy weight or withstand high wind pressure.
c) You can anchor the posts more firmly by making the holes slightly larger at the bottom than at the top.
d) Use a wood preservative to treat the section of the post that will be underground.
e) Brace each post with stakes after it is properly aligned. Keep the stakes in position until the concrete has thoroughly set.
5. Rails:
Rails do the spanning work in wooden fences, connecting one post to the next. They are the horizontal elements, running parallel to the ground. Top and bottom rails are almost always found in wooden fence styles; many will also have middle rails.
6. Panels (Boards):
It is the rails to which the panels will be attached.
Panels are sometimes attached so as to obscure the posts on one side or the other. Alternatively, the posts may be allowed to jut out in relief on one or both sides.
7. Paint the finished fence with a good quality waterproofing sealer. This will usually either contain silicone solids, or linseed oil. If you plan on painting finish paint, stick with an oil based sealer, and use oil based polyurethane paint or exterior enamel for the finish paint.
Tips:
Installing a fence on hill, or steep land can be tricky. Set posts at locations where the grade or slope changes, and average the height of the fence for best appearance.
Conclusion:
There are literally hundreds of variations in fence styles and construction materials. There is pre-assembled wood fencing sections as well as fencing materials made from recycled milk jugs. The type of fence you use depends primarily on the purpose.
Your Pool Needs a Fence around It – Provides Privacy (howtobuildahouseblog.com)


