A gravel driveway may be a great addition for your home. It provides curb appeal for any well-landscaped property.
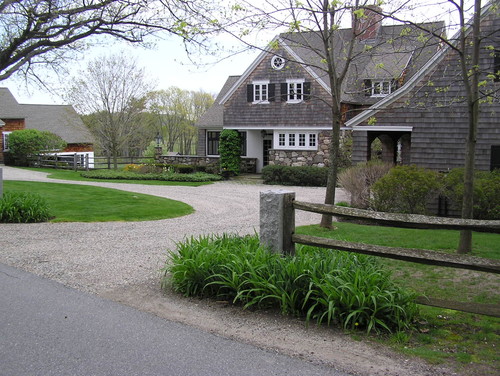
Photo by Woodburn & Company Landscape Architecture, LLC – Browse exterior home ideas
A gravel driveway has an appealing look, it is less expensive and it last longer than an asphalt or concrete driveway. Your gravel driveway can last more than 50 years, without any problems, whereas other types of driveways need to be re-covered or re-paved every 10 years, not to mention that a gravel driveway is virtually maintenance free.
Creating a good and long lasting gravel driveway that support people and cars, may depend on several aspects. You should take in consideration the type of soil and the nature of traffic that will be. Will be there only cars, minivans and SUVs or will be heavy traffic, maybe large trucks?
However, soil type will determine the base type and the gravel layer thickness. Other important considerations would certainly be the cost and availability of the covering layer (sand, crushed stone, gravel or other kind of material) and of course, the costs of transportation for these materials. There are quite large differences in quality and costs, several products being better to others, not to mention that some materials can be messier following rains compared to others.
A Smart Choice for Your Home – Asphalt Driveway (howtobuildahouseblog.com)
Material Type Considerations
Crushed stone or rock is perhaps the least dirty material but you cannot use only this kind of material for your driveway. You need to mix it with some soil to stabilize your covering layer. The best solution is a crushed rock type named “chat” that is extremely durable and of course, suitable for heavy traffic. With “Chat” you can create a beautiful colored driveway. In addition, there is no need to mix “chat” with any kind of soil for stabilization, because it has enough contained fine material, which will provide a good stability. “Chat” is indeed the best material for a perfect gravel driveway.
Sand-gravel is quite superior to clay-gravel in both toughness and its propensity to be cleaner quicker. A layer of sand-gravel put down quite thick will ultimately establish pretty hard, not to mention that sand-gravel it looks better than clay-gravel. It is true that clay-gravel is much cheaper than any sand-gravel but sand-gravel deserve the difference. The result is a better, prettier and much cleaner driveway. However, the decision of using clay-gravel or sand-gravel is also based on the gravel grade. Gravel grade means in fact, the rock content and especially, the rock size.
“Gulf Coastline Shell” or “South Texas Caliche” establish like almost a concrete driveway after a period of time, but unfortunately, gets pretty messy during a heavy rain, due to its fine material from the surface layer composition. “Caliche” is in fact, a kind of shell material that works pretty well under heavy traffic because it is graded very smooth and therefore, put it down in a very compact and thick layer.
Labour & Tools
An additional decision you must make is whether to do it yourself or hire someone to do the work for you. If you decide to do it yourself then you should take in consideration the availability of required equipment to blade the driveway, remove the dirt and a kind of heavy roller for compaction, not to mention the hand tools such as rakes, shovels, wheelbarrows, etc. These tools are essential to complete your driveway to a final, smooth and compacted surface. Of course, you do not have your own big tools, but you can easily rent them.
Steps
1| First, you need to calculate the quantity of gravel and other materials that you will need for your driveway. Generally, there are required no less than three different gravel layers.
a) Base Level: – a solid foundation that consists of heavy and large stones;
b) Aggregate Material: – dirt and sand that can be compacted onto the first layer (base level)
c) Top Level: – a gravel layer that consists of decorative stones and sort of softer pebbles.
However, you need to prepare correctly your driveway prior gravel application. The soil removal, the material thickness should be done correctly and carefully.
2| The next step is the leveling of the driveway. If it is a small area, you can use a shovel, a rake and a hoe to prepare and smooth the area. However, for large areas you need to rent a tractor or a backhoe to excavate the soil and level the ground in preparation of the gravel layer.
3| Pour your chosen gravel layer. First, it is the base level, then the middle is the aggregate material and finally, is the crushed pebble layer and gravel. You should level out carefully each level before adding the next level.
4| When your driveway has been applied, stamp the gravel layer to make it uniform and secure. You can use a hands-tamper or you can rent a compactor for larger areas.
5| Your gravel driveway needs maintenance. You should fix any dips or potholes that may occur in your driveway, especially after heavy rainfalls and snow.


