What is Venetian Plaster?
Venetian Plaster is an old kind of wall or ceiling finish, used for hundreds of years, that mimics the appearance of marble. Traditionally this finish is a stucco coating and a skilled professional using a spatula or trowel can create a beautiful surface with a depth sensation.
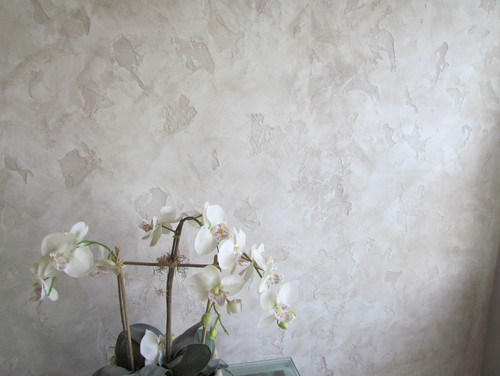
Photo by SG Decorative Painting and Murals – Search family room design ideas
However, today there are new materials made from acrylic polymers, and any handy homeowner can create the same beautiful glossy marble effect. Venetian Plasters with acrylic polymers are well known as very strong and easy to handle products and they can be found in any paint store.
Using these Venetian plasters you can create durables, long lasting and stunning surfaces. They are sold in one gallon cans just as ordinary paint. You can find these Venetian plasters in a wide range of colors.
Tools and Materials
– Steel trowel (or 6-inch drywall knife); grit sandpaper; Venetian plaster
– Primer; paintbrush; roller; paint tray; topcoat (paste wax)
– Gloves; eye goggles; drop cloth
Venetian Stucco – A Decorative Painting Type (howtobuildahouseblog.com)
How to Apply Venetian Plaster
1. Before starting the job you should know that Venetian plaster is not like paint. It is a good idea to practice the plaster application over some drywall pieces. Try with different plaster amounts to create different textures.
2. Protect the room floor, laying down a drop cloth.
3. Prepare the surface which has to be fine textured and even. File with compound any crack or hole and them. Clean the surface from any dirt.
4. Apply a coat of flat paint or primer. If the old paint is a glossy paint, you should sand the surface lightly prior plaster application.
5. You will apply the plaster with a steel trowel or a 6-inch drywall knife. It is possible in the process application to mark straight lines in the plaster. You can prevent that if you sand the sharp corners of the trowel.
6. Protect yourself from the acidity of the plaster which can irritate the skin – wear gloves and eye goggles.
7. Stir the Venetian plaster thoroughly prior each application.
8. Start to trowel on the base coat at a corner of the room. Take only a small amount of plaster on the trowel and spread it with small strokes in a thin layer on the surface. Don’t worry, if it isn’t covered every spot. In fact, you should try to work in different patterns. However, keep a smooth surface as much as possible. Allow time to plaster to dry.
9. For the second coat you have to use the same plaster color. The second coat should be applied in a thin layer with alternative short and long strokes.
10. Allow at least one day to second coat to dry.
11. The final step in Venetian plaster application is the burnishing of surface. You can do that sanding with very fine sandpaper and then wiping the surface with a damp cloth. For more polished effect you can use the flat side of a trowel or putty knife to rub thoroughly the plastered surface.
12. A topcoat layer will add durability and long lasting to the surface and it is highly recommended for bathrooms, laundry rooms, in fact, for every room exposed to the moisture. After topcoat application you should burnish again the surface using a putty knife. You can apply also, a thin layer of wax for an increased protection.


