When you’re renovating or building, there is frequently a lack of focus to the baseboard, which are supposed to be installed into your room. This apparently hidden detail could deliver a great deal of style, charm and warmth, taking in consideration that it ties together the numerous style aspects of different elements in the room.
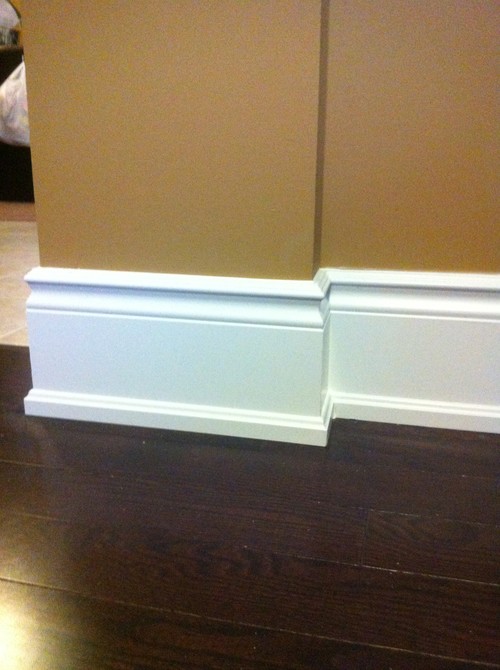
Photo by Trim Depot – Discover home design design inspiration
Baseboard ensures a smooth transition between two elements such as your floor and your drywall. This smooth transition, combine harmoniously the two, drywall and floor, and avoid the meeting of two hard edges. In other words, colonial baseboard enhances significantly the overall look of the room. There are wide range of styles and types to choose from, with various details and widths.
Colonial baseboard differs from manufacturer to manufacturer, but usually has a traditional classical look. It normally has a plane surface, with elaborate routing along one of its edge.
If you’re a handy person who wants to install yourself a colonial baseboard, maybe this article can help you, giving you some techniques and also tips that can make your job easier. However, these general rules and techniques will definitely work with other types of baseboards.
1| Use Coped Joints for Inside Corners
This little but important trick truly boosts the appearance of inside baseboard corner joints. Try this as an alternative of cutting both baseboards parts at 45-degrees:
a) Butt a baseboard piece against the inside corner with simply, straight angle (90 degree) cut on the edge.
b) Prepare the second piece of baseboard in two steps. Cut its joining edge at a 45 degree. The path of the angle is an inside miter – so, the 45 degrees angle will flare out from the back to the front of the baseboard piece. The moment you’ve slashed the angle, hold a saw (coping saw)perfect perpendicular to the piece of baseboard, and cut along on the angled edge. This will create a board piece, which will match perfectly in the inside corner against the other piece of baseboard.
Let’s see a another strategy to cut the coped joint. Since it could be quite tough to handle the cut of the straight part of your board piece profile with a saw (coping saw) and also, keep a straight line, you can “swindle” on this part. Cut the straight part of the board with a table saw. Stop where the curved section of the piece profile starts. Finish up the baseboard piece curved section with your coping saw in the same way as I mentioned above.
2| Using Scarf Joints
If a wall is too long and need more than one baseboard piece, you can use a banal scarf joint to join the both pieces. In a scarf joint, the both baseboard parts have each a 45-degree angle and these angled edges will overlap each other. When it is puttied, this joint will be almost undetectable.
3| Cutting and Drying Fit All Pieces
You can cut and also dry fit all the baseboard parts for your room prior to nailing and painting. This allows you tweak the fit, and more than that, all your baseboard pieces are prepared to be painted in only one-step.
4| Scribe Your Baseboard Pieces for Uneven Floors
There are big chances that your flooring is not flawlessly level. This is a common problem, which cause visible gaps spaces between your baseboard and floor. Tacking down between floor and your baseboard a round strip (1/4-inch) is a quick solution. However if you prefer a clean and better look of your colonial baseboard, you need another technique to solve this problem.
Scribing permits you to adjust the baseboard thickness to fit the low and high areas in your flooring. Let’s see how to scribe your baseboard:
First, you should prop your pieces of baseboards into their place. Then place a thin piece of plywood on the bare floor with a pencil on its top. The plywood scrap piece should be a little thicker than the biggest space in between the floor and baseboard. Sliding the pencil, that rest on the top of plywood scrap along the entire baseboard length will end with a pencil mark that shows the floor unevenness.
Check the pencil mark and see where this mark is closest to the baseboard edge. If pencil mark is right at the baseboard edge, then you free to go to the next installation step. However, if the pencil mark is a distance from the baseboard edge, you should measure this little distance and the entire baseboard line down with this distance. Use a belt sander and remove gently all the wood excess along the baseboard piece new line. The result will be a baseboard with a base edge that follows the curve of your flooring.
5| Baseboard Finishing
If you want to ease the finishing part of your job, you should buy from the beginning pre-primed baseboards. The best is to use a roller to apply the paint. It has a better coverage than a brush, not to mention the rapidity of execution. A 3” paint roller will give excellent results from a single one coat application.
Paint your colonial baseboard ONLY BEFORE nailing it to protect your floor and wall surfaces.
6| Nailing the Baseboard Pieces
Once your baseboard parts are all cut and painted, it is important to establish from beginning the order in which you’ll nail these baseboard parts in place. This will make a big difference because you need to take in consideration the joints.
For inside corner joints, you should to nail first the 90-degree piece and then the coped piece, which will be nailed in top.
For joints in the middle of a wall or for scarf joints, you need two baseboard pieces with opposed 45-degree cuts. First, you should install the piece with an inside cut. Then you need to install the second one with the 45-degree cut in a way to overlap the first one.
7 | Use a Stud Finder to Assist You in Nailing
When you nail your baseboard piece into the place, you should nail to a strip or a stud to be more secure. You can use a digital stud finder to locate the position of these studs.
8 | Apply the Caulking
It is a smart idea to run a length of green painter tape on the wall, in the top of the baseboard before applying the caulking. The result will be a clean and perfect edge.
Painting Baseboards in a Carpeted Room | How To Build A House (howtobuildahouseblog.com)


