The biggest question that comes up when building your own sauna is “What am I going to use for heat?” You can choose from electric, gas, wood burning or some other type of energy to fuel your sauna.
Electric is the most popular type of heater for a sauna. It’s convenient, safe and inexpensive. Gas is a little bit less expensive but be sure to check for carbon monoxide when using gas.
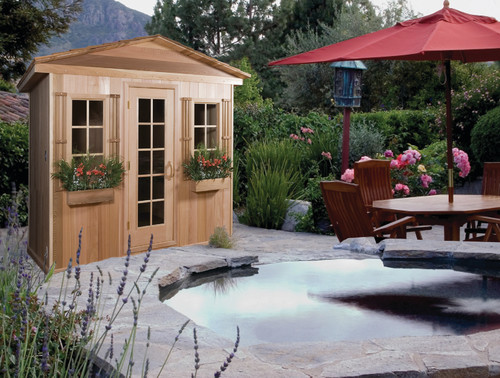
Photo by Baltic Leisure – Search patio pictures
However, many people consider the wood-burning sauna to be the top choice, especially if you have easy access to wood. Do you know why?
Wood provides a pleasant aroma and a traditional atmosphere, but obtaining the wood can be quite labor intensive unless you buy it already cut.
Considering that home saunas are believed to produce numerous health benefits and provide a relaxing spa experience, it’s no wonder than more and more people want to know how to build a home sauna, and building your own sauna can be easier than you think.
You can buy a prefabricated sauna that can easily be put together in less than 30 minutes or you can buy a kit and assemble it yourself if you have some basic woodworking skills.
Benefits and Maintenance of Saunas (howtobuildahouseblog.com)
How to Build an Outdoor Sauna
Outdoor saunas have become a standard in many back yard oases today. They are relatively easy to build, if you keep your design simple. The main thing is to provide a sturdy foundation for an outdoor sauna to sit on. Outdoor saunas can be built on an existing deck or concrete slab.
Although styles and sizes of saunas vary, the basic principles of sauna construction are the same, and these steps will give you a general outline of how to build a home sauna.
Choose a Spot for Your Home Sauna:
The first consideration before you build your own sauna is the location. Whether you are building in the city or country may determine a lot about the design of your sauna. This can determine questions as basic as whether it will be built, should it be freestanding or attached.
However, you need a spot where plumbing, heating and electricity are easily accessible. Your heat source also, may have impact where you decide to locate your sauna. If you plan to cut your own wood, you may want to place your sauna close to the woodpile.
Decide the Look, Design and Size of Your Sauna:
Do you want something simple that is prefabricated and ready to put together? Or do you want to cut the wood and collect the stones yourself? Each home sauna will vary greatly based on location, size and personal preference. The style and shape you give to your inner frame and outer wall will depend on how many people you wish to accommodate.
– Outdoor saunas can be custom build to fit a specific space or a pre fabricated outdoor sauna kit can be purchased to speed assembly time.
– Most outdoor saunas are constructed with Cedar or Redwood as these woods are naturally resistant to mold and mildew and will not rot like most woods. Conventional pressure treated wood can also be use.
– Another design aspect is the size of the sauna. How many people do you plan to accommodate?
Building Your Outdoor Sauna:
If you are building a small home sauna outdoors, you will generally not need a building permit. However, be sure to check with municipal authorities in advance, as plumbing and heating regulations may vary.
1| Outdoor sauna should be a simple structure consisting of wooden boards. If there is no existing framework you will have to install your own framing. Framework can be made from 2 x 4 or 2 x 6 lumber, spaced every 16 inches.
Cut the wood and planks to the lengths and widths you will need, based on your plans.
Leave room for three ventilation points: one in the ceiling, one on the floor, and one above the heater. Add spaces for benches and windows as desired.
2| Build a simple outer wall about a foot (or 30 cm) outside the inner frame. Using the birch or oak planks, build the outer walls
3| Because you to keep the heat in the room and save energy, the room needs to be insulated once the framing is in place. Insulation is placed between the framework studs in both the walls and the ceiling. Insulate the inner frame with fiberglass and add a vapor barrier to keep moisture off the fiberglass and help it last longer.
If you are building indoors the vapor barrier will also keep the moisture from affecting the rest of your house. Foil vapor barriers are common because they can also help reflect heat back into the sauna.
4| Now it’s time to start building the walls. If you use tongue-and-groove lumber you will avoid exposing metal nails in the sauna. Exposed nails can burn the skin in the high heat of the sauna.
Saunas in Finland are often constructed with Nordic white spruce. Cedar is another good choice. Nail the cedar planking over the insulation, using the wall frames and supports to hold the nails.
5| Roof the sauna with simple wood or tile and remember to keep a ventilation spot open for steam to escape.
6| Place the first layer of flooring using ceramic tile. This goes over your heating system and will collect moisture.
7| When the ceramic work is finished, you need to build wooden flooring panels called “duckboards” to place over the ceramic floor. They need to be removable so that you can clean them and the floor. Duckboards help avoid excessive heat and moisture on the floor.
8| Install the sauna heater.
9| Add any benches, windows and other fixtures as desired.
10| Fire it up, and observe the functioning of the ventilation points before using. Enjoy your outdoor sauna!
NOTE: A personal sauna requires constant upkeep. Remember to remove the floorboards to clean the ceramic tiles, clean the sauna heater, check the wood for any excessive bulging, and keep the ventilation points clear.


